- HOME
- ABOUT US
- SOLUTIONS
- Metal Roof PV Mounts and Systems
- Flat Roof Solar Panel Mounting Systems Solutions
- Tile Roof Solar Mounting Systems Solutions
- Solar Tracking Solutions for Commercial PV Projects
- Ground Solar Mounting Systems Solutions
- Floating Solar Solutions - PV Systems
- PV Solar Carport Mounting Systems Solutions
- Balcony Solar Panel Mounting Systems Solutions
- PRODUCTS
- PROJECTS
- COMPANY NEWS
- BLOG
- Contact Us

Standing seam metal roofs offer an ideal surface for installing PV modules. The raised seams on these roofs serve as connection points for mounting, utilizing clamps that securely grasp without penetrating the surface, using rounded screws. Metal roofs are typically coated with a reflective finish that effectively reflects sunlight. This not only extends the roof’s life but also decreases energy use by as much as 20%, making it an excellent match for solar PV systems.
Types of Standing Seam Metal Roofing Panels

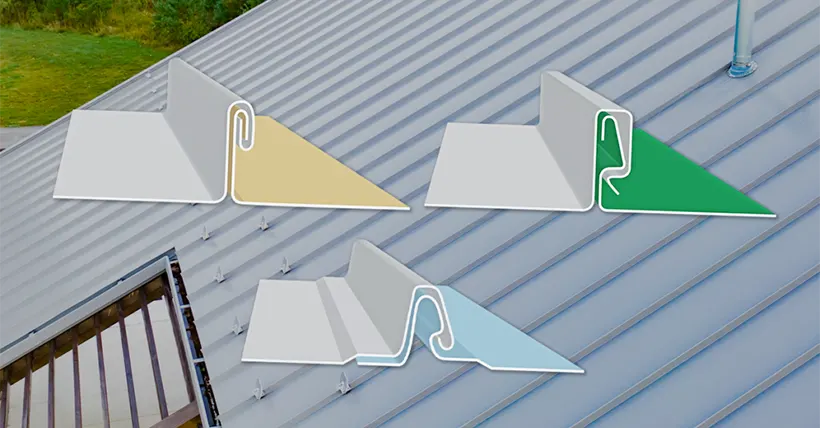
Standing seam metal roofing panels appear similar from the outside, but they differ in some distinct ways. These panels come in various types such as mechanical seam, snap-lock, and nail strip/fastener flange, each with unique performance metrics, engineering requirements, and pricing.
These roofing panels feature a concealed fastener system, hiding the fasteners from view and protecting them from the elements. This setup not only enhances the roof's appearance but also improves its resistance to weather, making it a pricier option compared to roofing with exposed fasteners.
Although there are many different types of standing seam metal roofing, the seam clamps designed for them on the market are workable for most of the common types of standing seam roofs. So don't worry, you can find clamps that will work with your specific seam style.
If you'd like to learn more about standing seam metal roofs, we recommend reading the blog post by Sheffield Metals. Please click here.
Standing Seam Roof Solar Mounts

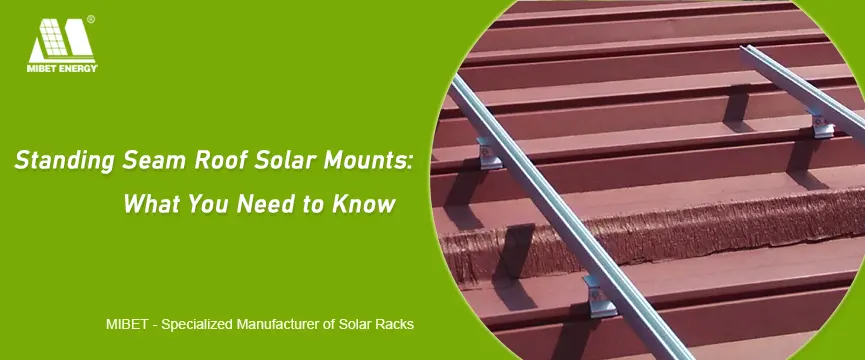
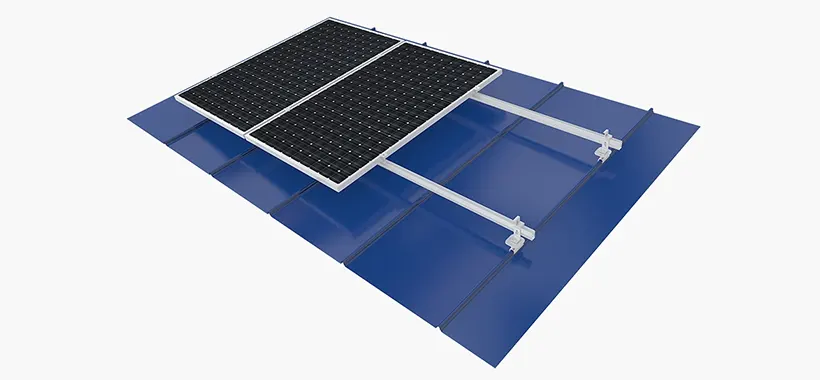
Standing seam roof solar mounts allow PV panels to be attached at the seams of metal roofs. The mounting system includes seam clamps, rails (optional with or without), mid clamps, and end clamps. Our clamps ensure a robust attachment to roofing without the need to pierce the roof sheets. It can be combined with other components, such as L-foot, fixed foot, or direct PV module clamp, facilitating swift connections to all rail components. Suitable for most metal roofing materials except copper, these clamps also safeguard roof coatings and preserve weather tightness guarantees.
If you need to know about our standing seam clamps, click here.
How to Install Solar Panels on a Standing Seam Roof?
With a standing seam roof, clamps fasten directly to the roof's seams. Solar panels and their racking systems are then securely mounted onto these clamps. One of the significant advantages of using standing seam roofs is that, unlike other roofing materials, there's usually no need to drill holes into the roof to install solar panels. This preserves the integrity of the roof and simplifies the installation process.
Step 1: Secure Mounting Rails
Secure the mounting rails to the roof seams using specialized clamps that grip without damaging the roof's surface. This method preserves the roof's integrity and ensures it remains waterproof. These clamps are typically fashioned from aluminum or stainless steel and are built to resist corrosion and endure high winds.
Step 2: Install Solar Panels
Place the solar panels onto the mounting rails and fasten them using bolts or clips specific to the mounting system in use. As you install each panel, make the necessary electrical connections, arranging them either in series or parallel depending on the design of your system.
Step 3: Connect Wiring and Inverter
Extend the wiring from the solar panels to the inverter, which converts the DC electricity generated by the panels into AC electricity suitable for home use. Position the inverter close to your main electrical panel. In some setups, opt for micro-inverters that attach directly to each panel instead of using a single central inverter.
Step 4: Inspect and Test the System
Perform a detailed inspection of all electrical connections to ensure they are secure and functioning correctly. Check that the inverter operates properly and that the system meets the expected power output. Implement monitoring systems to observe and record solar energy production in real-time.
Which Clamp to Use and How Many?
Before choosing clamps for your solar installation, reach out to the roofing manufacturer. They sometimes recommend specific clamps for their systems, and using a different type could void your warranty.
Standing seam roofs come in many forms, with new designs appearing regularly. Specialist solar panel mounting manufacturers like Mibet! offer a range of options tailored to different seam profiles. These clamps minimize stress on the roof panel during installation.
The thickness of the panels, which typically varies from 0.6 to 0.8mm, and the gap between the seams are also key factors in determining the number of clamps needed for the installation. Calculations for strength, typically done by the mount kit company, consider factors like wind uplift and snow load to precisely figure out the required number of clamps for a safe installation. Despite the variety in roof types, rest assured there's a clamp designed to match each seam perfectly.
What Direction Should Solar Panels Face on a Roof?

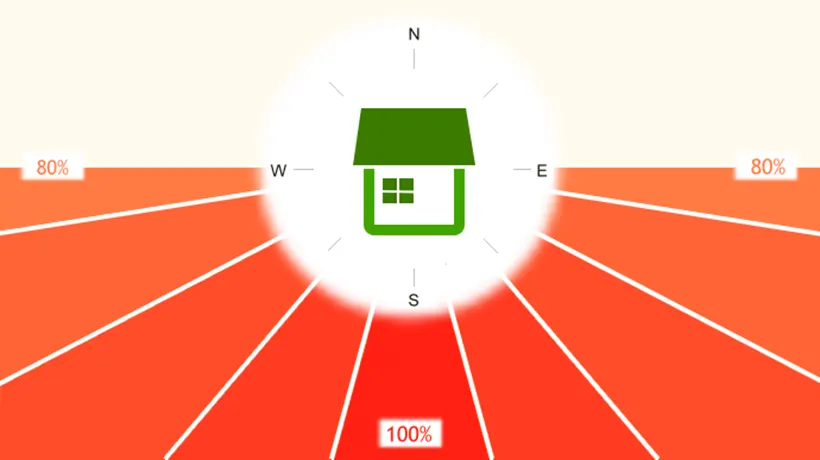
Solar panels typically mount on the roof, but the optimal angle depends on your specific location. Generally, a south-facing orientation yields the most energy efficiency and is often the recommended choice. However, panels can also be installed facing east or west. Many installers recommend avoiding the north side of the roof, where panels tend to capture less sunlight, reducing their overall effectiveness.
Solar Panels and the Lifespan of Standing Seam Metal Roofs
One significant advantage of pairing your solar energy system with a metal roof lies in the longevity of the materials. Industry standards suggest an average lifespan of 25-30 years for solar panels. In contrast, a well-maintained standing seam metal roof can easily last 40-60 years, often even longer.
This difference in lifespan offers a distinct benefit. When the time comes to replace your solar panels, you can breathe easy knowing you won't need to undertake a costly roof replacement or removal process. Your durable metal roof will continue providing reliable protection for decades to come.
Opt for a Light-Colored Metal Roof to Enhance Energy Efficiency
When planning a new metal roof for your solar-powered home, consider the impact of color on energy efficiency. Selecting a lighter shade like beige, tan, white, or light gray can significantly enhance your energy savings, even before factoring in your solar panels.
Darker colors, like black, tend to absorb more heat from the sun, while lighter shades excel at reflecting it away from your home. This difference in reflectivity can be substantial: light colors can reflect anywhere from 55% to 90% of sunlight, compared to a mere 5% to 20% for darker hues.
The reflective properties of lighter roof colors help to reduce the amount of intense heat your roof absorbs, which in turn minimizes the workload on your air conditioning system and lowers your energy bills.

